


Content editor tutorial
1) Log in to your account
2) Select the type of content you wish to create:
- Page – Select this if the article will remain on the web site permanently
- Story – Select this if the article will be on the web site for a few days or weeks
You may have access to additional content types if you have been assigned additional roles. See tutorials for those specific roles.
Note if you are editing an existing page be sure that the URL begins with “https”. You will not have edit access unless the connection is secure.
3) The “Create story (or page) form will appear. The interface to the Page and Story content types are identical. Begin by entering a title for 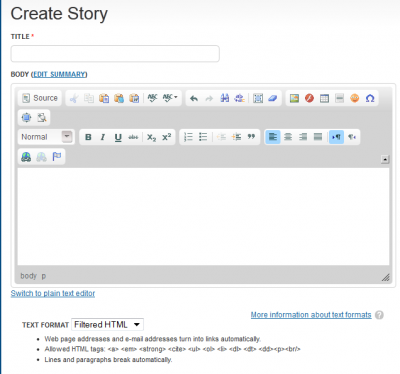 the article.
4) Enter the content into the “Body” text area
5) Change the content type from “Filtered HTML” to “Full HTML”. Filtered HTML is for entry from untrusted sources. It filters out most html tags. If your content contains images, links, etc they will be filtered until you change the content type to “Full HTML”. Access to various functions changes depending on what content type is set. For example if an image “Upload” button doesn’t appear its probably because the content type isn’t set to “full html”.,
6) Take a look at “Publishing options”. By default “Story” content is promoted to the front page. Page content is not promoted to the front page of the website. Check or uncheck this as appropriate
7) Click on “Save”. The article is written to the database.
Click on the “Browse Server” button and the following dialog will appear. By default it should be in your own user folder which is named with the letter “u” followed by your account id number. NOTE – jot down your folder id as you’ll want to return to it. You may browse to other directories by clicking on “root” icon. Other folder will then appear. Select one of the folder icons under root. You may then select an existing image from that folder. Note that if the “Upload” icon disappears, you do not have write access to that folder. Return to your own folder by clicking on the “root” folder icon and then on your folder id.
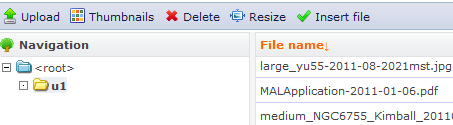
Click on the “Upload” button on the left size of the dialog. Select the image on your local machine. After upload is complete click on the “Insert file”. NOTE: If the “Upload” button doesn’t appear, check that the content type has been set to “full html”.
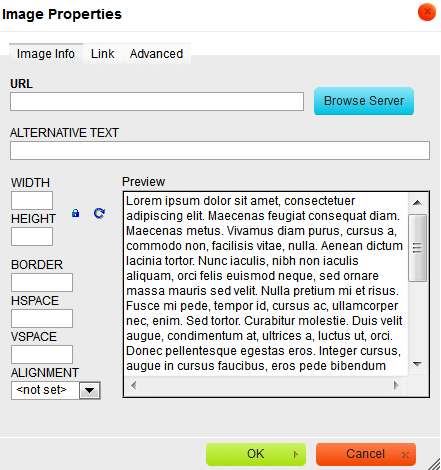
The “Image Properties” dialog will appear. Set alignment as appropriate — usually “left”. Click on the “OK” button and you’ll return to the “Create story” or “Create page” form.